PRTG Manual: Account Settings—Schedules
To open the account settings of the currently logged in user, select Setup | Account Settings from main menu. Click on the tabs to change the different settings.
Account Settings Tabs
You can define the following aspects of your account settings:
In the schedules settings you can define and change schedules for the currently logged in user. This can be used to pause monitoring at certain times. You can also use schedules to define the time spans that are to be covered when creating reports.

Schedules Settings
Note: This documentation refers to the PRTG System Administrator user accessing the Ajax interface on a master node. For other user accounts, interfaces, or nodes, not all of the options might be available as described. When using a cluster installation, failover nodes are read-only by default.
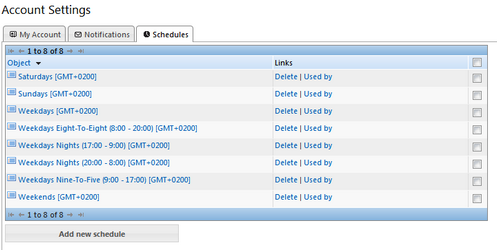
Click on the Schedules tab to show a list of all existing schedules. Using the links next to the notification name, you can perform the following actions:
- Delete: Delete this notification (not possible for predefined notifications)
- Used by: Show a list of objects using this notification.
Please see also Working with Table Lists. Additionally, there is multi-edit available. This enables you to change properties of several objects at a time. For more details, please see Multi-Edit Lists section.
Click on the Add new schedule button or click on the name of an existing notification to edit.

Edit Schedule Time Table
Basic Settings |
|
|---|---|
Schedule Name |
Enter a meaningful name for the schedule that describes the defined time span(s) or purpose. |
Edit Mode |
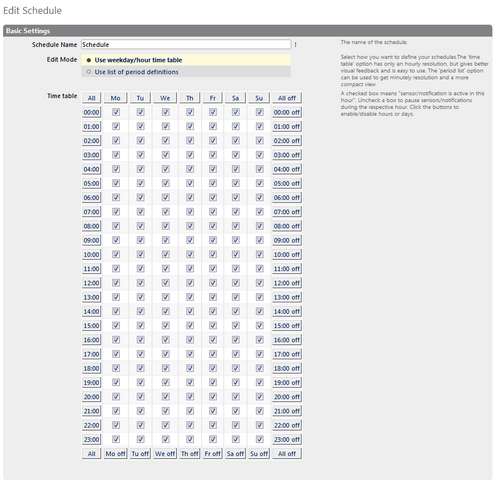
Select how you want to define a schedule. Choose between:
|
Time Table |
This selection is only visible if the time table option is enabled above. Define the schedule. It will be used for monitoring objects, reporting, and notifications. You can set time spans with a precision of one hour by setting check marks. If a box is checked, it means the object is active during this hour, if unchecked, the object will be paused during this hour. You can set check marks individually, or change complete ranges for certain days of the week or time spans.
|
Period List |
This field is only visible if period definitions are enabled above. Define the date/time ranges in which the objects using this schedule will be inactive (i.e. paused). During other times, the objects will be active. Enter the ranges in the format ww:hh:mm-ww:hh:mm. For details and examples, see Schedules Settings—Period Definition Syntax below. |
Inherit Access Rights |
|
User Group Access |
Define which user group(s) will have access to the object you're editing. A table with user groups and right is shown; it contains all user groups from your setup. For each user group you can choose from the following access rights:
You can create new user groups in the System Administration—User Groups settings. |
Click on the Save button to store your settings. If you change tabs or use the main menu, all changes to the settings will be lost!
Schedules Settings—Period Definition Syntax
Define one or more periods of time during which the object using this schedule will be inactive. In each line, enter one range in the format ww:hh:mm-ww:hh:mm: weekday, hour, minute.
- Possible values for ww: mo, tu, we, th, fr, sa, su.
- Possible values for hh: Enter the hour in 24 hours format (no AM/PM allowed), i.e. a number between 00 and 23.
- Possible values for mm: Enter the minute, i.e. a number between 00 and 59.
Example In the following, find an example of a schedule that pauses an object during the weekend as well as on Wednesday evenings. fr:19:30-mo:06:05 Any object using this schedule will be paused from Friday, 7:30 p.m. to Monday, 6:05 a.m. as well as on Wednesday from 6:45 p.m. to 11 p.m. It will be active during the other times. |
There are some settings that have to be made in the System Administration Tools, available as native Windows applications. For more details, please see sections: |
|---|
Keywords: Configure,Configure Schedule,Schedule
